
Photo courtesy of Gavin Haverstick.
If you want your studio to be taken seriously, then you need to project an aura of professionalism. And, if you’re working out of a dirty, disorganized room with broken-down gear, subpar acoustics, and a creativity-killing vibe, you’ll plant yourself squarely in the “amateur” category. Here are — in no particular order — some tips for improving the look and feel of your studio.
Clean Your Room
Remember when your mother made you clean your room? Guess what. She was onto something. Not only does a dirty studio display a distinctly unprofessional image, but also dirt and dust are really bad for your gear. So, break out the broom, dustpan, and dust cloth and get to work. You should also wipe down your computer, peripherals, control surfaces, and instruments. Dusty electronics? Don’t fret. Compressed air is your friend.
Declutter Your Space
Similar to tip #1, having lots of miscellaneous junk lying around your studio not only clutters your mind and stifles your creativity, but it also makes you look like a rank amateur. A good rule of thumb is to remove anything from view that you don’t plan to use. Put your microphones and instruments in their cases when they’re not being utilized. Fold your mic stands and music stands and put them away. And get rid of non-studio items like papers, books, magazines, and — most importantly — trash. These items have no place in a professional studio environment.
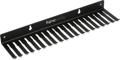
Organize Your Cables
If it takes you 15 minutes to locate an XLR cable, then you’ve got a problem. So, get organized. Sort through your cables and dispose of any that are damaged. Develop an intuitive labeling system so you can find what you’re looking for quickly and effortlessly. Invest in cable organizers. Tired of plugging and unplugging cables? Get a patchbay. You’ll appreciate how much easier life is when your cables are organized. No more jerking on wires, wasting time during setup, and — potentially — plugging something into the wrong jack and damaging your equipment.
Maintain Your Gear
Few things scream “amateur” louder than badly maintained gear. That’s why you should set up your guitars, keep your drums in tune, replace faulty tubes, and fix scratchy pots. Keeping your gear in tip-top shape is the easiest way to optimize your recordings. After all, your gear is what stands between a sound source and your final result. Simply put, recording an optimized instrument through well-maintained gear will sound better than capturing an out-of-tune instrument through broken-down gear — even if it’s an expensive instrument and the broken-down gear is the highest of high end.
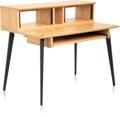
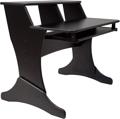
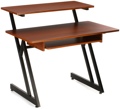
Invest in a Studio Desk
We hate to break it to you, but, if you’re using an old card table for a studio desk, your studio does not look professional. And your back probably hurts, too. Luckily for you, Sweetwater stocks a wide range of high-quality studio desks to fit every need and budget. Whether you want a simple workstation, one with built-in racks, a slide-out keyboard tray, or even height-adjustable legs, we’ve got you covered.
Streamline Your Ergonomics
After you have your desk squared away, you should take note of the rest of your studio. Does your studio’s ergonomics impede your workflow? If you have to walk across the room to adjust your preamp gain or compressor threshold, then you’re wasting time. So, what can you do about it? For starters, keep oft-used gear within reach of your chair. You should also make sure that everything is at a comfortable height. If you have to bend over or twist your body to reach something, then you’ll want to rectify this. You should also be able to operate your mixer or control surface, as well as your computer keyboard and mouse, with your wrists in a neutral position. And, while you’re at it, give your chiropractor a break and get yourself a proper studio chair.
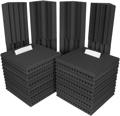
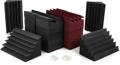
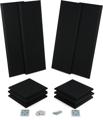
Fix Your Acoustics
If your room sounds bad, then any prospective client who steps into your studio will doubt your credentials. That’s where acoustic treatment comes in. Short of building an acoustically perfect space from the ground up, acoustic treatment is the most effective way of eliminating common room problems, such as flutter echo, standing waves, and other ear-fatiguing nastiness. Sweetwater stocks the industry’s finest absorption, diffusion, bass traps, and room kits, plus our Sales Engineers are always on hand to offer their expert advice. Not sure where to start? Check out Auralex’s free room analysis for an intelligent starting point.
Condition Your Power
Are you plugging your gear into an unfiltered power outlet? Bad idea. Not only does this put your expensive equipment at risk of power surges and spikes, but it also opens you up to all kinds of electromagnetic and radio-frequency interference. That’s why we strongly recommend that you get enough power conditioners to accommodate your entire studio.
Dim Your Lights
Glaring overhead lights are not conducive to creativity, and the glare is bad for your eyes. That’s why you should put lighting in your studio that’s cozy, inspiring, and easy on your eyes. Dimmable lights are a great place to start. Shine a spotlight on your most visually impressive gear. For extra color, try positioning a wash light against a wall. And, of course, you can never go wrong with an old-school lava lamp.
Questions? Give your Sweetwater Sales Engineer a call at (800) 222-4700. We’ll be happy to point you in the right direction.